One of the most common things I hear from new clients is, “I just don’t know what to expect.” And honestly, that’s completely understandable. Scalp micropigmentation is still relatively new compared to a lot of cosmetic treatments, and there isn’t always a clear picture of what actually happens on the day. So I want to walk you through exactly what a session at Simply Scalp looks like, from the moment you arrive to the moment you leave.
Whether you’re booked in for your first session or you’re curious and just exploring your options, this breakdown should give you a really clear idea of the process, the experience, and what to expect at each stage.
First Things First: The Consultation
Before any treatment begins, every new client at Simply Scalp goes through a detailed consultation. This is something I take seriously, it’s not just a quick chat before we get started. It’s where I get to understand your hair loss history, your scalp condition, your lifestyle, and most importantly, your goals.
We’ll look at things like:
- The extent and pattern of your hair loss
- Your natural hair colour and skin tone
- The look you want to achieve, whether that’s a shaved head effect, added density, or coverage for a scar or alopecia patch
- Your medical history and any skin conditions that may affect treatment
The consultation is also your opportunity to ask me anything. I’d much rather you come into your first session feeling fully informed and confident than uncertain about what’s happening. I handle every consultation myself – there’s no passing you off to someone else at Simply Scalp.
Session One: Laying the Foundation
Your first SMP session is all about establishing the framework for your treatment. This is where I begin placing the initial layer of pigment deposits across the treatment area, working methodically and carefully to build the foundation of your new hairline or scalp coverage.

Here’s what the process looks like, step by step:
Step 1: Marking the Hairline
If we’re creating or redefining a hairline, I’ll spend time marking it out before placing a single dot of pigment. This is one of the most important stages of the entire treatment. A hairline that looks right on paper or on your face in a photo might not translate correctly to your scalp – so we take our time here, refining the shape until it’s right for your facial structure, age, and personal preference.
Step 2: Pigment Selection and Matching
I mix and select pigments specifically for you. Your skin tone, natural hair colour, and how your skin is likely to absorb and hold pigment all factor into this. At Simply Scalp, I never take a one-size-fits-all approach to colour matching – getting this right is what separates natural-looking results from ones that look off.
Step 3: The Pigment Application
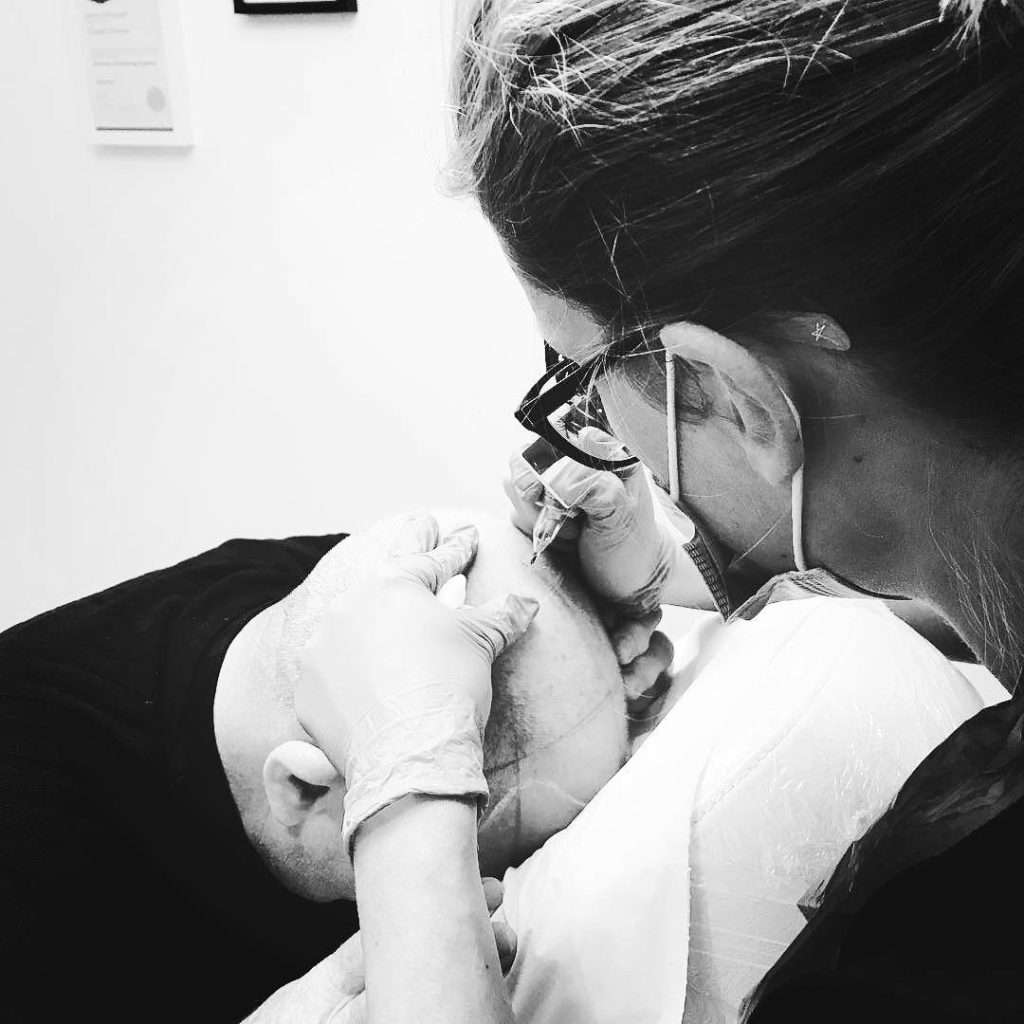
Using a specialist SMP machine and needle configuration, I begin placing tiny, precise pigment deposits into the upper dermis of the scalp. Each dot is designed to replicate the appearance of a hair follicle. I work across the treatment area systematically, ensuring even coverage and consistent dot size, shape, and depth.
The sensation during this stage is often described as a light scratching or tapping. Most clients are genuinely surprised by how comfortable it is. Pain levels are generally very low, and the vast majority of my clients find the experience completely manageable without any intervention at all. At Simply Scalp, we do not use topical anaesthetics of any kind – and in my experience, they’re simply not necessary.
Step 4: Review and Check
Once the initial application is complete, I’ll review the work with you before you leave. We’ll look at the overall coverage, the hairline shape, and the tone. Your feedback matters here, and I want you to feel happy before your next appointment is confirmed.
How Long Does a Session Take?
Session length varies depending on the size of the treatment area, but you can typically expect:
- Smaller areas (such as scar coverage or localised alopecia patches) – approximately 1 to 2 hours
- Mid-sized treatments (receding hairlines, crown coverage) – approximately 2 to 3 hours
- Full head treatments (complete hair loss, grade zero shaved look) – approximately 3 to 4 hours or more
I never rush. Each session is given the time it needs to be done properly, and I’d rather take a little longer and get it right than cut corners to keep things moving.
What Happens Between Sessions?
After each session, your scalp needs time to heal and for the pigment to settle. This usually takes around 10 to 14 days. During this period, you’ll likely notice the treatment looks darker and bolder than the intended final result – this is completely normal. As the skin heals, the pigment softens and settles into a much more natural tone.

I’ll give you full aftercare instructions after every session. These cover things like:
- Keeping the scalp dry for the first few days
- Avoiding sun exposure and sweating heavily
- Not picking or scratching the scalp as it heals
- Moisturising with a recommended product once healing is underway
Following the aftercare guidelines properly has a direct impact on your results, so I take the time to explain everything clearly and I’m always available if questions come up between appointments.
Sessions Two and Three: Refining and Perfecting
SMP is a layered treatment. No matter the extent of hair loss – mild, moderate, or advanced – every client at Simply Scalp completes 3 sessions. This is not about filling time or adding appointments unnecessarily. It’s about achieving results that are genuinely convincing, consistent, and long-lasting.
Each session builds on the last:
- Session 2 – adds depth, density, and refines the initial work once the first layer has fully settled. This is where the treatment really starts to take shape.
- Session 3 – the finishing session. This is where we perfect the tone, address any areas that need more attention, and make final refinements to ensure the result looks exactly as it should.
By the end of session 3, the transformation is complete. The result should look natural, proportionate, and tailored specifically to you.
What Does the Finished Result Look Like?
The goal of SMP at Simply Scalp is always a result that looks undetectable. When done well, scalp micropigmentation creates the convincing impression of a closely shaved head of hair or restores the visual density of thinning hair. People should notice that you look well-rested or younger – not that you’ve had something done.
You can see real client results in the Simply Scalp gallery. These are genuine outcomes from real treatments carried out in my clinic.
Is SMP Permanent?
SMP is a long-term cosmetic treatment, but it does fade gradually over time due to natural skin cell turnover and sun exposure. Most clients find results remain looking great for several years before a top-up session is needed. I always advise protecting your scalp with SPF to help preserve the pigment for as long as possible.
If at any point you want to adjust, update, or remove your SMP, I also offer professional SMP removal at Simply Scalp using laser technology.
Ready to Find Out More?
If you’re considering SMP and want to understand how it could work for you specifically, the best first step is a free consultation. I’ll look at your scalp, talk through your options honestly, and give you a clear picture of what’s achievable. There’s no pressure and no obligation, just a real conversation with someone who genuinely wants to help.
Book your free consultation at Simply Scalp today.
Frequently Asked Questions
Q1: How many SMP sessions will I need?
Every client at Simply Scalp completes 3 sessions, regardless of the level of hair loss. This applies whether you have mild thinning, a receding hairline, or complete hair loss. SMP is a layered process and 3 sessions are required to build the depth, density, and tone needed for a natural, long-lasting result. Trying to achieve a finished outcome in fewer sessions would compromise the quality and consistency of the treatment. Each session is spaced approximately 10 to 14 days apart to allow the scalp to heal and the pigment to settle fully before the next layer is applied. This structured approach is what allows us to achieve results that look genuinely convincing and refined.
Q2: Does SMP hurt?
Most clients are pleasantly surprised by how comfortable SMP is. The sensation is typically described as a light scratching or tapping on the scalp – not sharp or intense. Pain tolerance varies from person to person, and certain areas of the scalp (such as the temples or back of the head near the bone) can feel slightly more sensitive than others. However, the overwhelming majority of clients at Simply Scalp manage each session comfortably without any assistance. Sessions typically last between 1 and 4 hours depending on the size of the treatment area, and most clients find the experience entirely manageable from start to finish. At Simply Scalp, we do not use topical anaesthetics of any kind. If you have concerns about comfort, I’m always happy to discuss this during your consultation.
Q3: What should I do to prepare for my SMP session?
There are a few simple things you can do to help ensure your session goes as smoothly as possible. Arrive with a clean scalp, free from any product buildup, oils, or residue. Avoid heavy sun exposure to the scalp in the days leading up to your appointment, as sunburned or overly dry skin can affect how the pigment is absorbed. Stay well hydrated and avoid alcohol for at least 24 hours before your session, as alcohol can thin the blood and affect skin sensitivity. Wear comfortable clothing and be prepared for your session to take anywhere from 1 to 4 hours depending on the area being treated. If you have any questions about preparation specific to your treatment, feel free to get in touch before your appointment and I’ll be happy to advise.
Q4: How long does each SMP session last?
Session length depends on the size and complexity of the treatment area. Smaller areas such as scar coverage or a localised alopecia patch typically take around 1 to 2 hours. Mid-sized treatments covering a receding hairline or crown area usually take 2 to 3 hours. Full head treatments for complete or extensive hair loss can take 3 to 4 hours or more. I never rush a session. Getting the pigment placement, depth, and density right takes time, and I’d rather invest that time than cut corners for the sake of speed. You’re welcome to bring water and snacks, take short breaks if needed, and make yourself as comfortable as possible during your time in the clinic.
Q5: How soon will I see results after my first session?
You’ll see an immediate difference after your first session, but it’s important to understand that the final result builds gradually across all 3 sessions. Immediately after session 1, the treatment will look bolder and darker than the intended finished look – this is completely normal. As the skin heals over the following 10 to 14 days, the pigment softens and settles into a more natural tone. By the end of session 2, the treatment starts to really come together in terms of depth and density. Session 3 is where the final refinements are made and the result reaches its full, polished appearance. I always encourage clients to be patient with the process and trust that each stage is building towards the finished outcome.
Q6: Will my SMP look natural straight away?
After your first session, the treatment will look more pronounced than the final result, which can feel surprising at first. The pigment appears darker in the initial days as the skin is still healing, and the dots may look slightly larger or bolder than they will once settled. This is a normal and expected part of the process. As healing progresses, the colour softens and the deposits become more refined in appearance. By the completion of your 3rd session, once everything has fully healed and settled, the result should look natural, proportionate, and consistent with your skin tone and features. The goal at Simply Scalp is always a result that looks like you – just with a full, confident appearance.